This section contains basic instructions on how to print PantherNet documents such as unofficial transcripts, class master reports and class rosters directly to a networked laser printer. A “networked” printer is a laser printer that is connected to the mainframe, not a laser printer connected to a desktop computer.
Every networked laser printer can print in three styles depending on the layout of the PantherNet document. The three styles are:
Each of these different styles is identified by a printer number. Each style listed above has a different style number. Please contact the IT Help Desk to find your closest network printer and obtain the correct printer numbers.
On-Line Printing
On-line printing in the student system can be used for 1) unofficial transcripts; 2) rosters; and 3) student schedules. The default spacing for on-line printing is double-spaced.
Transcripts
The direct command for unofficial transcripts from the Student Information System Main Menu is as follows:
SR TR DT – along with the student’s ID number
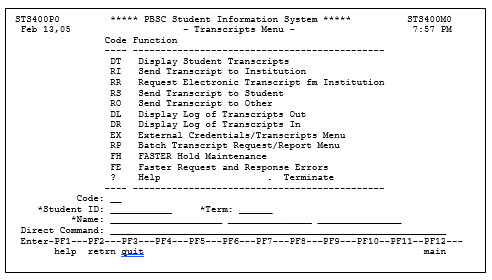
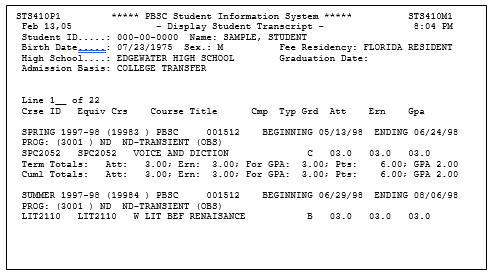
Press Enter. Transcript is displayed. Press ‘PF5’ to print. Print screen is shown below.
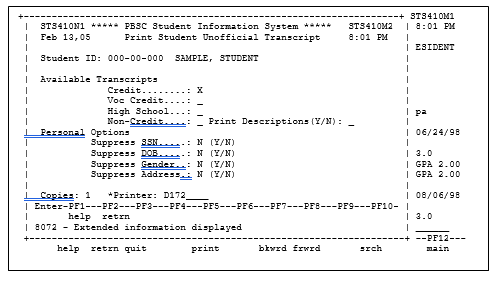
Enter the type of transcript desired, number of copies and the printer location, if required. The printer ID’s can be accessed through the ‘F1’ key. Press Enter. You will be given a message at the bottom of the screen indicating that the transcript has been printed.
Class Rosters
The direct command for class rosters from the Student Information System Main Menu is as follows:
RG CA PR – along with the course reference number
Enter the reference number or browse by term. The reference numbers and printer ID’s can be browsed with the ‘F1’ key. Enter the printer ID, if required. Press ‘Enter.’ You will be given a message at the bottom of the screen indicating that the roster has been printed.
Student Schedules
The direct command for student schedules from the Student Information System Main Menu is as follows:
RG RS PS – along with the student’s ID number
Fill in the student ID, term and printer ID, if required. Press ‘Enter.’ You will be given a message at the bottom of the screen indicating that the schedule has been printed.

Batch Printing
Batch printing can be used for Curriculum Requests and Registration Requests.
Curriculum Request Samples (see screen below)
- Class Master
- Class Master Responsible Division and Department
- Non-Credit Coordinator Report
- Building and Room Report
- Open Class List
Direct command from the Student Information System Main Menu is as follows: JS CU
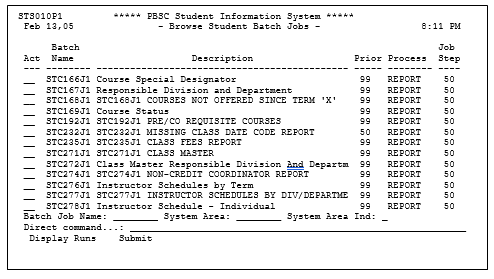
Tab to the report you wish to run and choose submit (S) to bring you to the following screen to enter your parameters. Each parameter allows you to choose options on how the report will run.
- Make sure ‘Run Now’ indicates ‘Y.’
- To see a description of the options for each parameter, tab to the ‘>’ sign, select the parameter by typing an ‘X’ and press the Enter key to see the options.
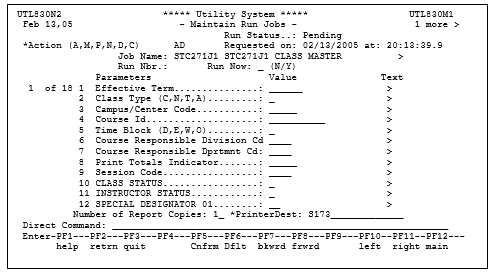
Press ‘PF2’ to exit the description. You have two options on how you may print the report. You can print the report directly to the printer or you may view the report on-line before printing.
Note the Run Number so that you can check the run status if needed (see page 179).
Please note: To print without viewing, in the printer destination field, type ‘S’ and three digits for the printer ID (e.g., printer D14 would now be S014). To view your job on the Intranet Web, in the printer destination field, type WEB.
Batch printing will be single-spaced on regular white 8-1/2 x 11” paper. Printing to the Web is the preferred method because you can view the report prior to printing, or you may not need to print the entire report. You can view the report and then delete it without printing.
Printing Reports from the Web
To print reports from the Web, follow these steps:
- Logon to EmployeeWeb with your User-ID and password that you use for signing onto PantherNet and email at the following Web address: www.pbsc.edu/EmployeeWeb
- You will see the following screen:
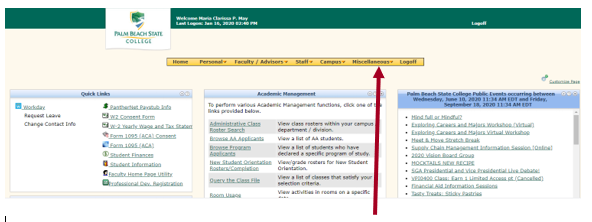
On the Yellow Menu Bar is an entry marked “Miscellaneous” – this is where the menu is located for printing reports – hold your mouse over this part of the menu bar.
- Click on the menu entry that is marked PantherNet Reports
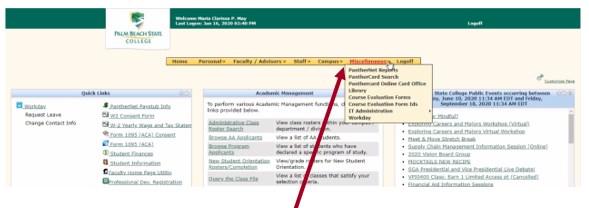
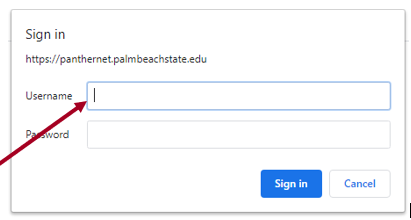
- You will be prompted to sign in with the same user ID and password that you use for email and PantherNet.
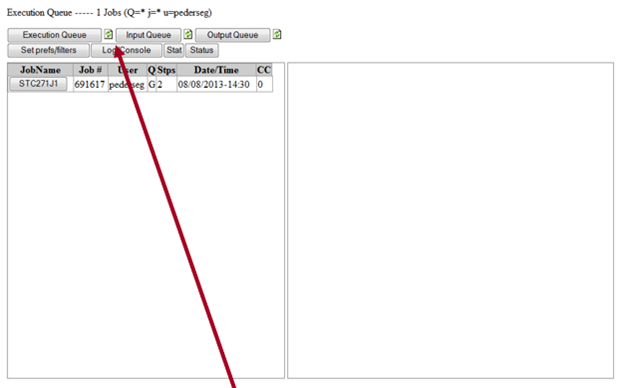
- The screen above will appear. The Execution Queue shows jobs that are currently running. The Output Queue shows jobs that have finished. Click on the appropriate tab, typically the Output Queue to see your completed batch job.
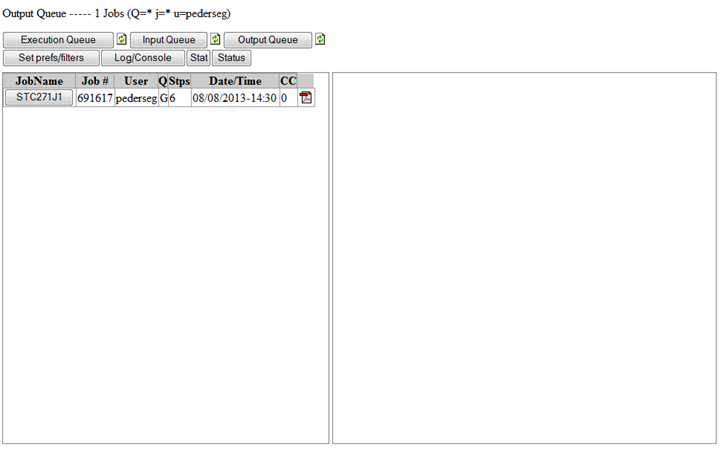
- To view the output from a report, click on the button with the report name.
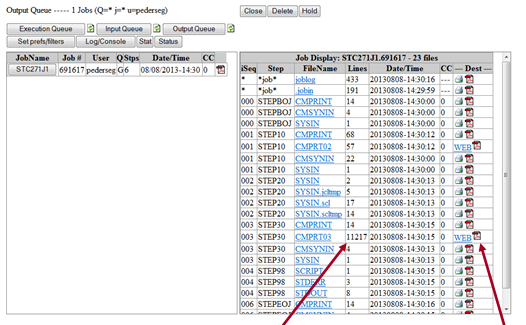
- All of the job output is listed – look for the one that has the most “lines” – this is typically your actual report output. Click on the PDF symbol and a popup will appear on your screen. You may print the output or view it on the screen.
Other Reports Available on EmployeeWeb:
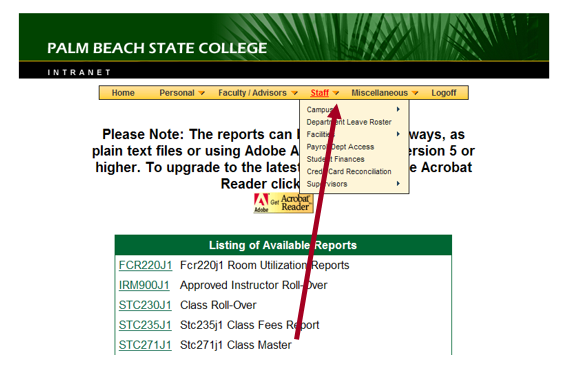
Under the Staff Tab on the Yellow Menu bar are additional reports.
Click on the report you would like to run – Example:
These are the same reports that are available from the PantherNet “green screens” but the report can be run from the Web.
QCLASS
QCLASS is a quick utility that can provide short summary reports.
Direct Command: CU QC QC
After you enter this command, the following screen is displayed:
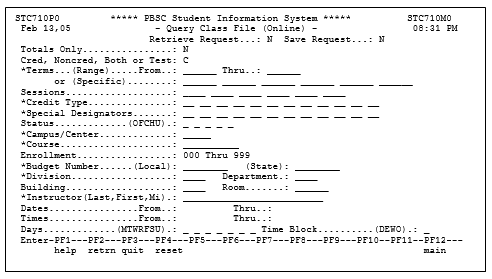
On this screen, you enter the parameters you want to run to produce a customized report. Some of the fields have the asterisk so you can use the F1 key to find out about those values.
Some Details:
TOTALS ONLY – if the field is set to “Y”, the summary screen is produced. An “N” produces detailed listings.
Examples:
Find the current FTE, enrollment and occupancy of all ENC 1101 classes in 2005-2.
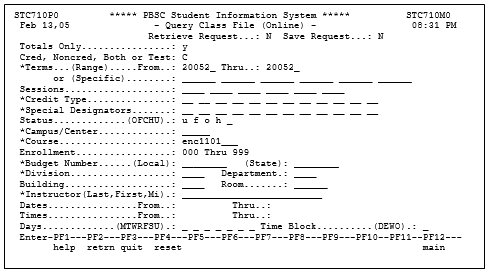
The following report is produced:
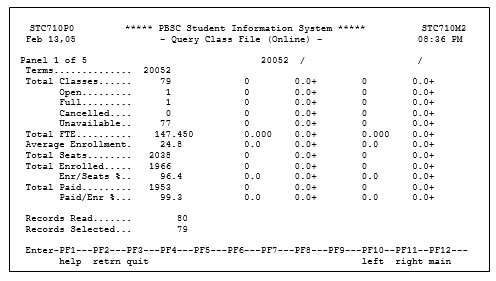
Running the same report with Totals only = N produces:
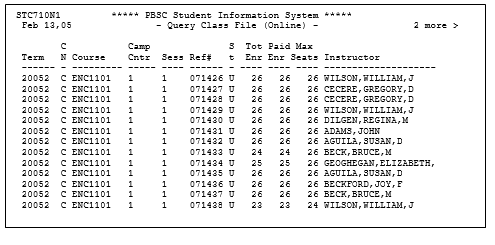
If you become familiar with the parameters, the number of different quick reports you can run is limitless. Because this program takes some system resources, it is not recommended to be run frequently during peak registration.
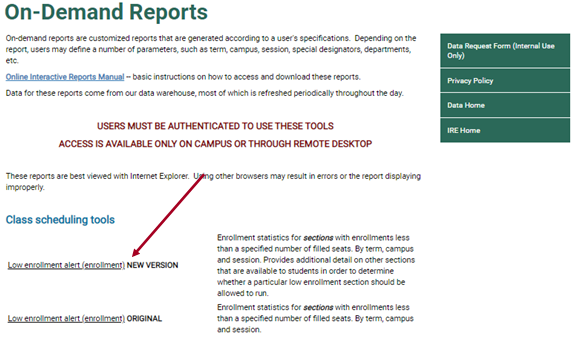
Online Interactive Reports
Users may generate reports online through additional reporting tools. These tools are accessed from: www.pbsc.edu/ire/Data/interactive-reports.aspx
Interactive reports are customized reports that are generated on demand, allowing users to specify parameters, such as term, campus, session, etc.
Data for these reports come from Palm Beach State's data warehouse, which is refreshed at least once a day, normally by 7:30 a.m. Please note these reports may not be accessible from off campus computers. Access may also be restricted based on specific data permissions granted each user by Information Technology.
How to Use Interactive Reports
Step 1: Point your Web browser to: www.pbsc.edu/ire/Data/interactive-reports.aspx
Step 2: Click on one of the report names you wish to run.
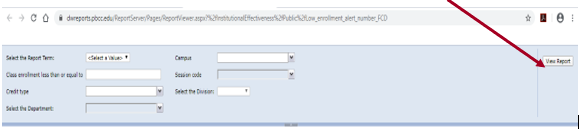
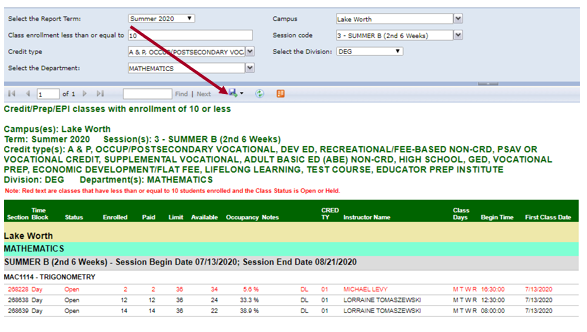
Step 3: Select Criteria for your report
Each report you click on will have different selection criteria. This example is the Low Enrollment Report. On this report you select TERM, CAMPUS, CLASS ENROLLMENT, CREDIT TYPE, DEPARTMENT, SESSION CODE and DIVISION. After selecting the values you want, click the VIEW REPORT button.
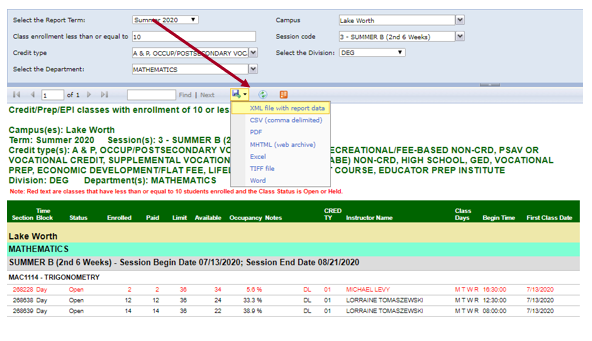
Step 4: View Report
Your report is now viewable on the screen. You may also select to save the report as a different format. Click the SELECT A FORMAT pulldown menu.
Step 5: Save Report (if needed)
Select the format in which you would like to save the report.
Please refer to the Web page at: www.pbsc.edu/ire/Data/interactive-reports.aspx frequently, as new reports will be added.